|
|
Project Division: Manual Project Division |
|
|
Project Division: Manual Project Division |
Use Manual Project Division to divide the contents of a project amongst a number of different team members. The resulting sub-sections can then be processed independently of each other and then re-imported back into the master project at a later time.
To export a section of a project to a new file, open the project and select File->Project Division ->Manual Division from the main menu.

The list box on the left hand side of this dialog box will display the contents of your active project. To select items for export into a new project file follow these steps: -
Select an item from the active project using the cursor or mouse. Then select the -> button to move it to the Destination tree control. You can select a group or individual items for export.
Specify the name of your destination project in the Destination File Name entry box.
You can specify the name of the person you are exporting these items to using the Section Assigned To text box.
Press the OK button to create a new project file that contains your chosen selection.
|
|
If you’ve select an item for export by mistake, simply re-select the item in the Destination tree and select the <- button. This will move it back into your active Project TTK file. |
|
|
Once an item is exported from your Project TTK file it cannot be modified until it is imported back into its original Project TTK file. |
Use the Project Navigator to find sections that have been exported. Each section of a Project TTK that is exported will have a ![]() symbol alongside it.
symbol alongside it.
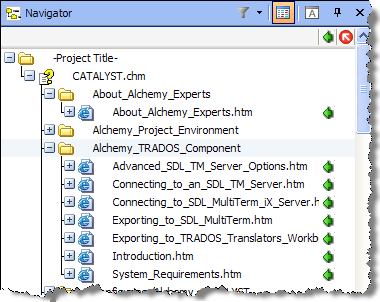
In the example above, all the HTML files in the Alchemy_TRADOS_Component folder have been exported.
| (c) Copyright Alchemy Software Development Ltd. |